
Introduction: Use joystick and motor to build a simple elevator structure.
Advanced: timed lifting and automatic control based on weather conditions. For example, the raising and lowering of the national flag.
Advanced: Consider the labor-saving structure of elevators and increase degrees of freedom, such as horizontal and vertical directions.
Experiment: Physics Experiment: Pulley System Experiment.
1、Teaching objectives (knowledge preparation)
Get to know motors, understand their control and usage methods.
Implement the lifting effect using motors through programming.
Being able to combine real-life application scenarios and apply project devices to achieve intelligent application scenarios in daily life.
2、Teaching tasks
Build a device that can use a joystick to control the operation of a motor for lifting and lowering.
3、Preparation of teaching environment and equipment
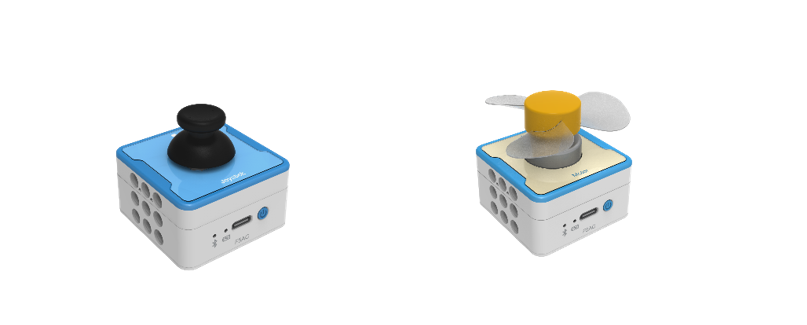
Equipment List: Image (with label number 123456)
Equipment Serial Number Table
| Serial number | number | equipment | Specifications | quantity |
| 1 | Joystick | 1 | ||
| 2 | Motor | 1 | ||
Software: Smart Code programming software.
Hardware: SMART Code kit: Joystick ,Motor.
Other: Several building block devices.
Detailed List of Structural Components
| Serial number | number | equipment | Specifications | quantity |
| 1 | 3-hole beam | 12 | ||
| 2 | 7-hole beam | 4 | ||
| 3 | 13-hole beam | 4 | ||
| 4 | T-shaped beam | 4 | ||
| 5 | Black sales | 36 |
Note: Materials required to fix a set of sensors: 6 3-hole beams, 2 7-hole beams, 2 13 hole beams, 2 T-shaped beams, and 18 black pins.
4、Project Practice Process
(Summary of Knowledge Points: 1. Components. 2. Program Modules. 3. Program Design)
1.Project video (in video format)
2.Project Steps
1.According to the item list, fix the joystick and motor.
2.Consider the lifting structure of the motor and the selection of torque.
3.The fixed support structure at the bottom of the elevator is considered to be stabilized using an “工” – shaped structure.
4.Use SMART Code to program and control devices.
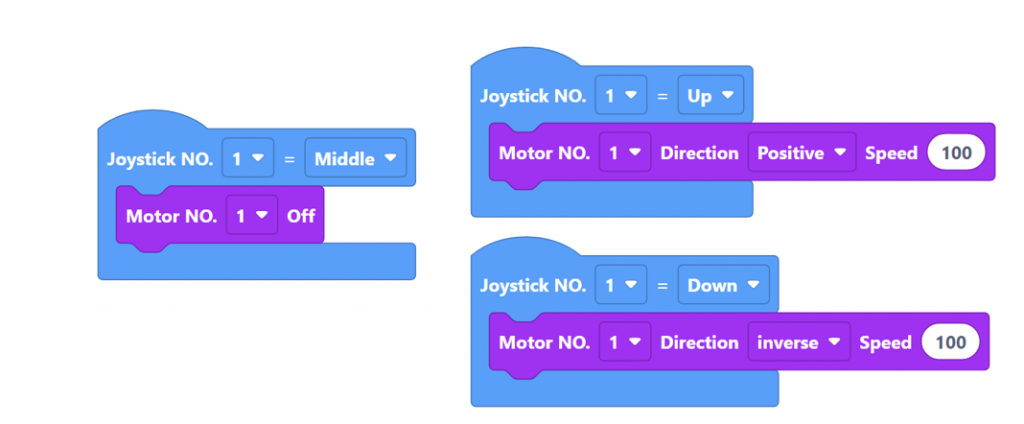
Firstly, it is recommended to use three advanced statements for joystick control, which are joystick up, down, and middle states. The example code is as follows:
Finally, add the motor rotation statement, with the joystick pointing upwards indicating forward rotation and the joystick pointing downwards indicating reverse rotation. The example code is as follows:
5.Run the program and debug the lifting speed.
6.Optimization and improvement plan.
7.Interesting thinking: Explore more effortless lifting structures.
3.Reflection and discussion: Can we increase the lifting direction and degrees of freedom?
Experimental results
Data records: Table 1 and Table 2
5、Extension and Expansion
Reflection and exploration:
Question 1:
Question 2:


